The install went ok, but had to replace my soldering iron part way through as it wasn't cooperating anymore. The one I was using is from Harbor Freight. This particular soldering iron is very difficult to use for small electronics, such as this kit. It was like trying to drive a large RV on a go-cart course. It could do it, but was all over the place, constantly going places where things shouldn't go. At least was able to use the solder sucker to do some cleanup.

So, on Black Friday, headed to Radio Shack and picked up their 40 watt soldering iron. This is truly meant for this task but is little powerful so a ginger, and experienced, hand must wield it.
Prior to starting, laid out all the little baggies of electronics. Was a great sight to behold!
 |
| Top of LCD shield |
 |
| Bottom of LCD shield before soldering |
 |
| Hard to solder area. |
While in Surprise, AZ, where went to Radio Shack, stopped by Trader Joe's to pick up some natural cellulose sponges. Put one of them into a tray of water, and use it to clean off tip of the soldering iron. Someone on Vashon Island told me about this trick to keep the tip clean and pretty and hot.
 |
| Oops, Upside down, completed unit |
Rest of the assembly went fairly smooth. Nothing major to report other than there was a glob of solder, on the front side, between two directional buttons (the up and right ones) that was causing a short, and hence made the menu navigation somewhat difficult, near impossible. Frustrating, but this was one of the items soldered with the Harbor Freight iron. Lesson learned.
Have two problems..
1. The crock pot I was using somehow has a crack in the ceramic liner right now. Not sure how it happened, but really liked this crock pot. Got it from my Mother many years ago and don't think there's a way to fix the crack.
2. The auto-tuning software for this is somewhat buggy, from what have seen on the Adafruit forums. For me, and the crock pot, it really doesn't get it tuned in well at all. Not sure if this is due to crock pot, me, the software, or what. Saw someone had posted update to the software but haven't tried it yet. Will after get another crock pot, or rice cooker. Prefer crock pot.
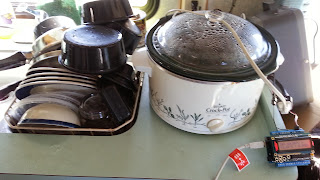 |
| Plugged in and somewhat working, plus clean dishes!!! |
No comments:
Post a Comment